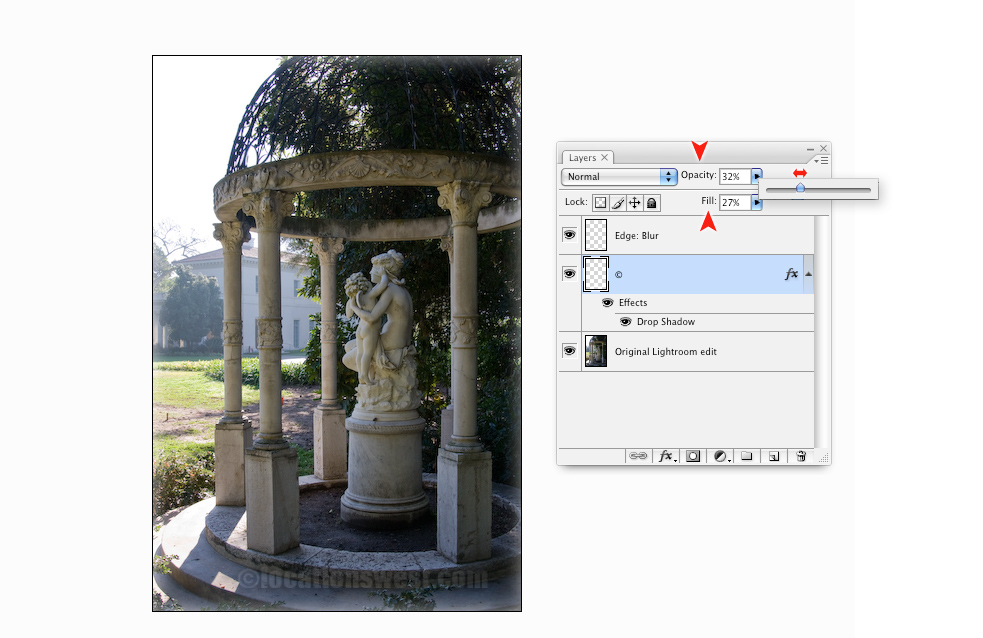
7) When you drag your cursor over the image at this point you will see your Copyright/ID (watermrk) move over the image as well. Click your mouse to drop that Copright/ID inside the new layer, 'Layer 1'. (NOTE that 'Layer 1' is sitting up-above the 'Background' or picture layer and, as 'Layer 1' is transparent – save for what you just stamped – you see your picture below the 'watermark'.)


your stamped image


The importance of having stamped your ID inside the new layer you made will now become apparent as you both lower its Opacity and Fill values...

lower pano id transparency
lower layer opacity and fill

...and then decide to move your stamped identifier to the most appropriate spot within the image.

old corral

The best spot in one picture may not be the most appropriate spot in others.


That's all there is to it. Now go mark your photos. It's really quite simple after your first go-round.

Some things to keep in mind:


    - Double-click on the layer you have just stamped your identifier/watermark on ('Layer 1'). Rename the layer '©'.
This is primarily an organizational suggestion. Naming the layer you just stamped helps you remember in the future what that layer contains! Look at the screen capture just above. That '©'-labeled layer looks empty, right? It actually contains my ID/satermark. Without the '©' – or, say '©locationswest.com', I might think I just have an empty layer there and eventually drag it to the trash. Then it's gone. Remind yourself in the future by renaming the layer now!

    - Another reason to have your Copyright/identification tag on its own separate layer is that you can choose in the future to turn it off and then turn it back on again. Layers are a key component for controlling your work in Photoshop.

    - Control the size of your ID stamp: By using the Left Bracket key ('[') and Right Bracket key (']') you can decrease or increase the size of your saved ID brush.

    - Play with layer Opacity and Fill. This is important!
Your identifier is there to make sure those who have the image know where it came from. (It is also a great way to make sure someone else doesn't appropriate your work as their own!) However, you don't want this element to detract from viewing your image. The eye should 'see-past' your stamped watermark.

Here is an example of using this branding technique in a group of pictures used as a presentation. The images in this page are not 'locked' into a Flash module so viewers can either Right-click the pictures to save them into a folder on their Mac/PC or simply drag-and-drop them onto their desktop. Fortunately, because I went through this process of stamping each image first my ID stays with the images!

Now, how about building a Photoshop Action to speed up the process of watermarking a series in advance of building a web gallery?


Previous Page | Tutorials home page

The Phoenix Lightroom Enterprise | Location Scouting Services | RoundWorld | Wassup | Contact